So lets burn a bootloader on those ATMEGA8 chips I bought on
dx. For that we need the pinout of the chip.
If you intend to do this, please follow the excellent tutorial where I learnt everything from
http://itp.nyu.edu/physcomp/Tutorials/ArduinoBreadboard
 |
| By FDominec (Own work) [CC-BY-SA-3.0], via Wikimedia Commons |
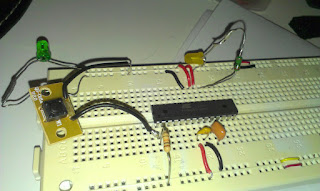
The first thing I do is to put it on a breadboard and wire up the 2xGND to GND and VCC, AVCC and AREF to +5V. Put a 10KOhm pullup resistor to RESET (Pin 1) so that the chip do not reset by itself. If we want to reset it we connect the RESET pin to GND, preferably through a button.
All IC create noise so to smooth things out i put a 104 Capacitor between VCC and GND.
 |
| minimum setup |
Next I put the 16Mhz resonator between XTAL1 and XTAL2. This way we can run the chip in 16Mhz instead of the internal 8Mhz resonator. You can also use a crystal here but I wanted to try the resonator this time around.
Next I put a LED and a 220Ohm resistor in series on PB5 (Arduino PIN 16).
 |
Its time to include the programmer.
|
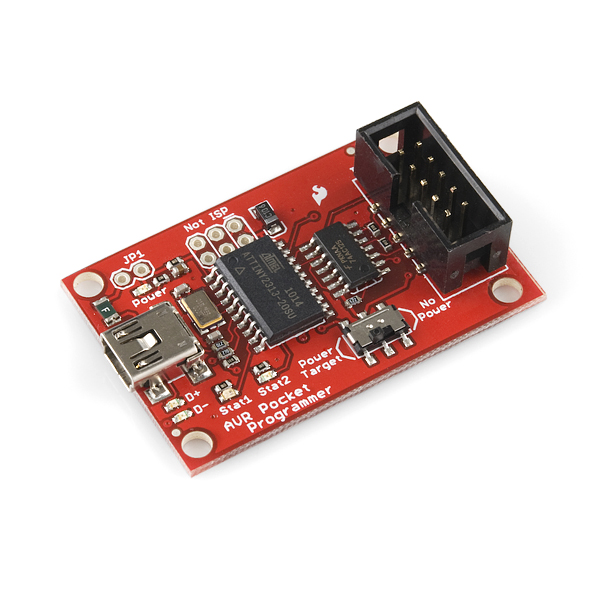 |
| AVR Pocket programmer |
 |
| AVR programming adapter |
I use the AVR pocket programmer and the AVR adapter that you can find here:
 |
| The programmer is attached |
The programming adapter has clearly marked out pin-out and you connect it like this:
- GND to GND rail on breadboard
- 5V to 5V rail on breadboard
- MISO to PB4 (MISO, Arduino pin 12)
- SCK to PB5 (SCK, Arduino pin 13)
- RESET to RESET pin 1
- MOSI to PB3 (Arduino pin 11)
Now lets connect the programmer to the computer and start Arduino IDE.
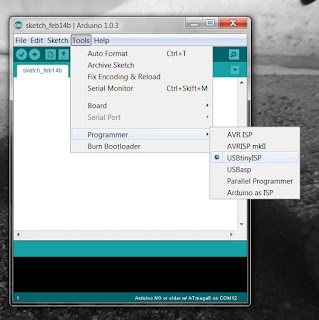 |
| Select USBTinyISP programmer |
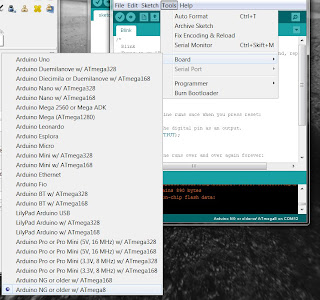 |
| Select a ATmega8 board |
To test programming the chip you can try to upload the Blink sketch using the programmer. For this you do not need a bootloader. Please note that if you have a bootloader on the chip it gets replaced.
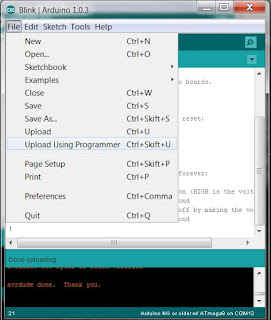 |
| upload a sketch using the programmer |
If you see your PB5 (Arduino pin 13) LED blink you can proceed to burning the bootloader. Under Tools you find "Burn Bootloader". It takes a while and after you should see the pin 13 LED blink very fast if you reset the chip.
 |
| Burning the bootloader |
Next step is to program the chip serially for that I moved the chip to my home built Arduino board. I could have created a header on the breadboard, but its getting late here.
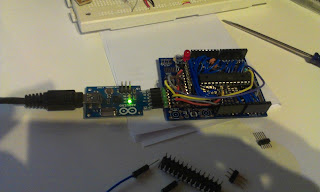 |
| I removed the Amega328 carefully with the help of a flat screwdriver and inserted the Amege8 chip |
And now I can upload the Blink sketch using normal serial upload...


No comments:
Post a Comment