It is not as if I need another Arduino, but...
I bought two Arduino like PCB's not long ago and I have looked forward to soldering them. I find it fun soldering, and I have made a few Arduino boards of my own, all on perf-board or strip-boards. Usually I have to work at night after the kids are sleeping and I sometimes do a sloppy job, because of fatigue and amateurishness...Tonight I got the rest of the family at my parents in law so for once I can go soldering early in the evening.
I did not order any parts, I had most of the parts at home, except for the crystal and the intended caps, but I worked with what I had... I replaced the crystal with a 16 MHz resonator. I only had a 25 MHz and a 12 MHz crystal at home, both intended for other projects so I had to go for the resonator. A resonator has a little bit worse precision, but I have never noticed that.
 |
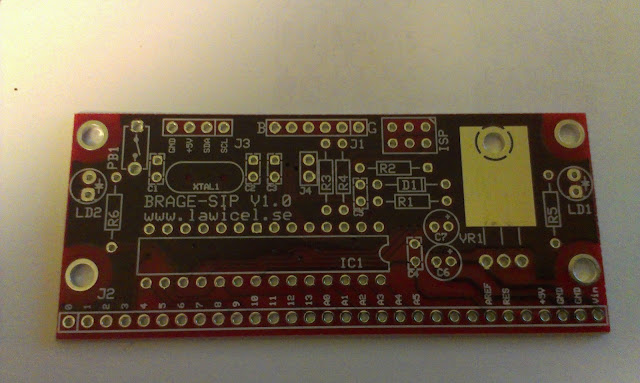
| The board is called Brage (from the Bragi son of Odin) from Lawicel |
 |
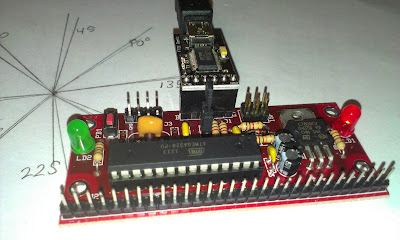
| Soldering went ok, but I think its time for me to upgrade my solder iron. |
I think I for once did a nice job. It is so nice to work on a well-made PCB, where everything is laid out nicely and you can relax and just follow the instructions.
Features:
The PCB is a Arduino board but with a non-standard layout. All the pins are laid out along one of the sides. That way if you use a bent header you can place it sideways standing from a breadboard. It also has a ISP and a I2C pinout. I chose to use regular male headers, since I have lots of them and use cables with female connections.
There is no USB or FTDI chip on board so you need a USB to serial programmer to program it. It has one power LED and one D13 LED and a reset button.
It can be powered from the FTDI or from a VIN pin using a 7805 IC.
In short a nice board and a fun soldering experience. No problem getting it to run the blink sketch.
 |
| Brage with ATmega328 from Lawicel-shop |
 |
| Programming Brage using FTDI and Arduino IDE |
No comments:
Post a Comment