Showing posts with label 433Mhz. Show all posts

Saturday, April 13, 2013

Playing with robot component layout

Today I started to think of different layouts for my robot. I intend to put lots of stuff on this one, that means I quickly ran out of space. Therefore the layout will require at least 3 storage's of components. 

On top camera and electronic compass
Nothing is connected so far, I have tested different components separately. For these images I just put stuff on top of each-other to get a feel for the space requirements and possible problems.

Middle level, USB hub with wifi, Raspberry Pi Model A, and batteries
One of the main concerns is interference on the electronic compass circuit. That must be tested together with other components. Another concern is that I think I might run out of Arduino pins, so I'm prepared to use two boards for this robot. My third concern is battery consumption, the RPi needs to be powered, so the plan is to power the USB hub from batteries. For that I need to 7805 circuit that has a decent ampage...
Bottom level, H-Bridge, Arduino 1, Arduino 2 with 433 MHz radio and speaker.
A speaker for the localization-trilateration of the robot.
Distance Sensors,HC-SR04 and Sharp IR sensor for mapping

Now its time to drill holes and connect the different components...

Saturday, February 23, 2013

More failing attempts to measure the distance

Introduction

My goal is to use a number of microphones to pinpoint the location of a sound-source. In my case I´d like that sound-source to be a robot and the microphone array helps it to locate itself.

The microphone is synchronized with the robot using 433Mhz radio, I did some attempts using a wire but get signals passing through it.
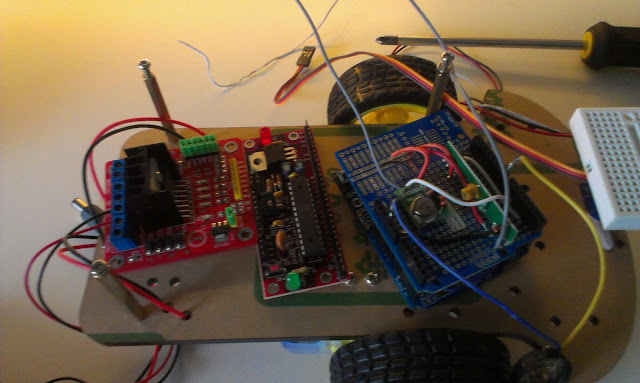
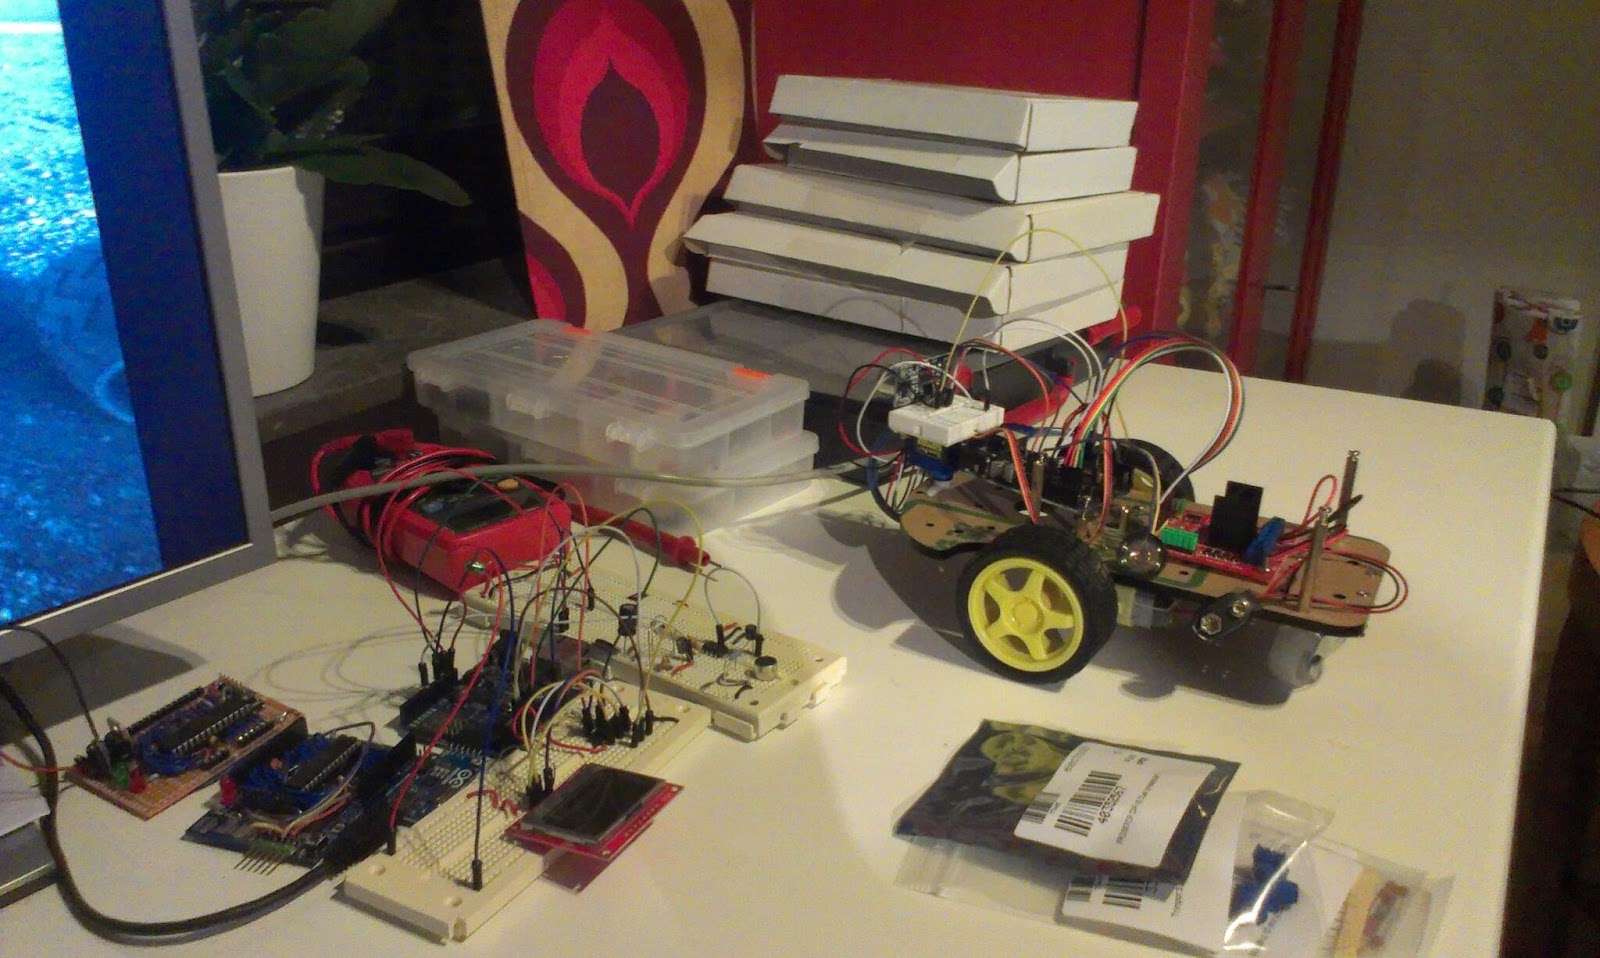
The sound source(Robot) with 433Mhz radio and speaker

Method 1. The Goertzel Library

I have used this library to detect a specific frequency. The library detect the frequency but I get both false positives and false negatives at such error rate that it becomes unusable.
It does not seem very good with low amplitudes.

Method 2. FFT

I have successfully used FFT to isolate and identify the specific frequency the robot emits. The problem is that the FFT takes a long time to sample(256 samples) and to process.
That means that I can detect that the sound but not the exact timing the sound arrives at. There are also some issues with measureing time when the library shuts down timers and interrups...

Method 3. XR2567CP Tone Decoder (today)

The third attempt uses a tone decoder IC to identify the frequency. The datasheet was a pretty bad scan, but eventually I managed to get it correctly setup.

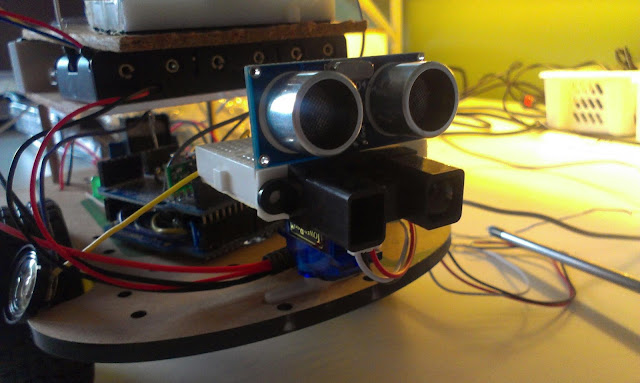
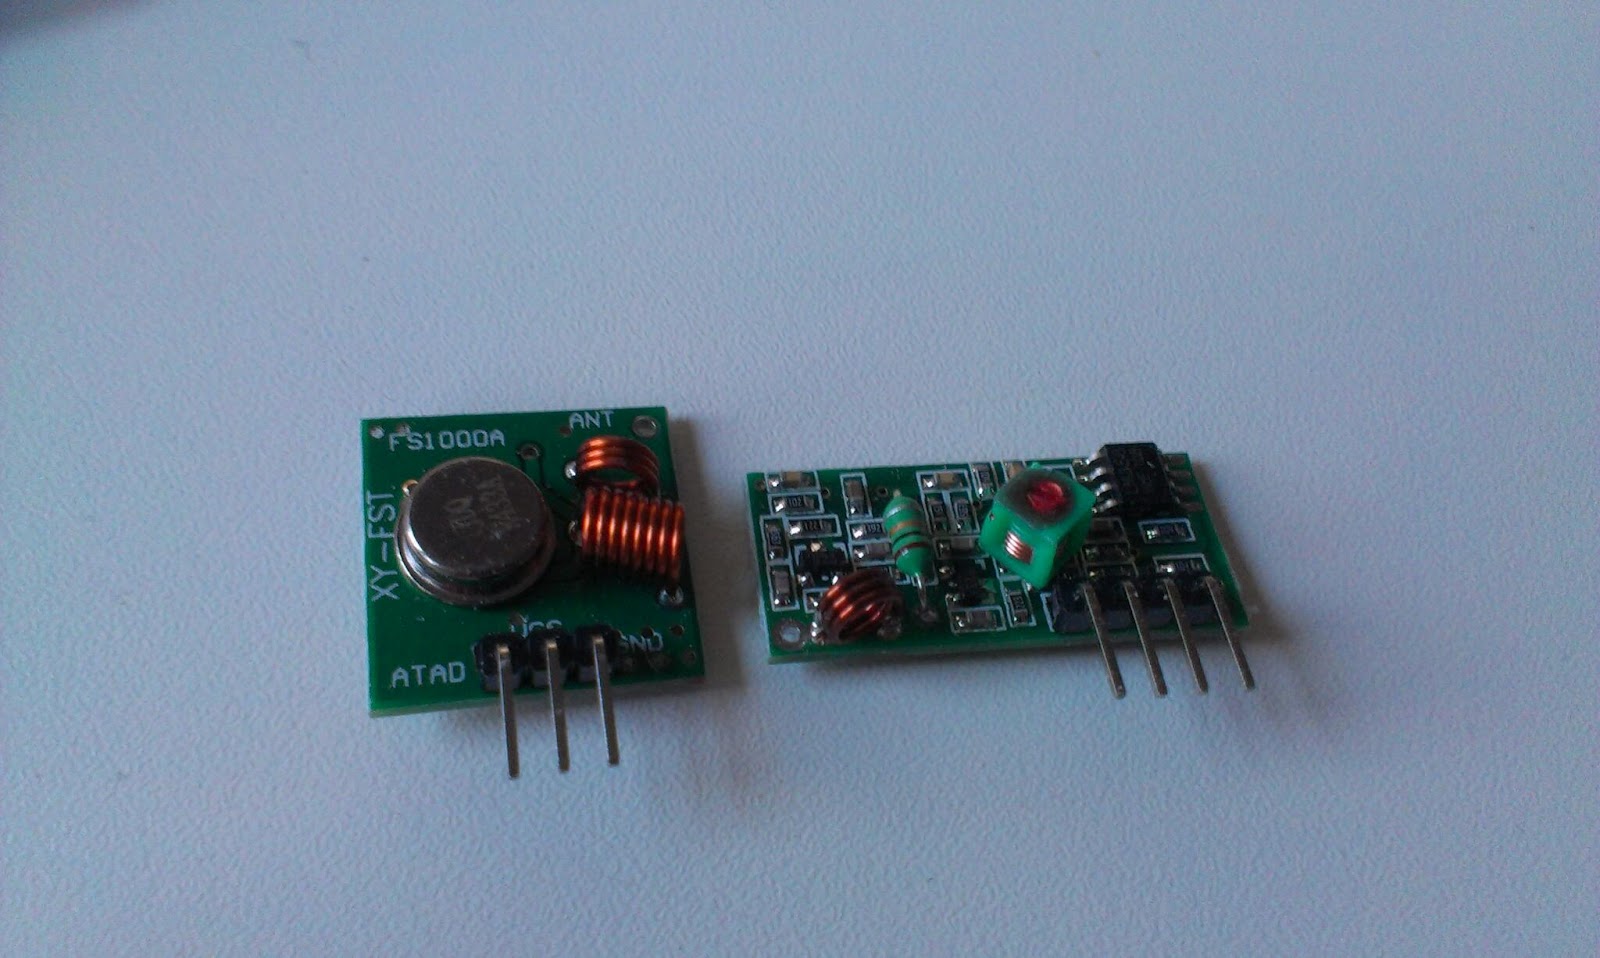
The receiver microphone in the center, the amplifier and XR2567 in the middle and 433Mhz radio to the right.
The circuit sends a radio pulse to the "Robot" and the Robot transmits a short sound of 4670Mhz. The pulse is picked up and time is measured.

Unfortunatly the XR2567 takes a "long" time to lock itself to the frequency and with different delay each time. The datasheet actually specified this in a graph.

Conclusion

Fail on all three methods, so what is next? 

I believe I will try with ultrasound!


Friday, February 22, 2013

First attempts to get a distance, failed

The current setup, the breadboards with microphone and the robot with speaker
Last night I did a first attempt to measure the distance between the robot-Arduino and the other Arduino board.

Method

The robot first sends a synchronization through a wire (fatal mistake) and after a specific time interval the robot outputs a sound signal through its speaker. 
On the receiving Arduino I wait for the signal  through the wire and starts a timer when it is received and when the microphone picks up a sound the timer is stopped.
The time difference is multiplied with the speed of sound 340 m/s to get a distance reading.

Results

The issue was that the speaker produces A LOT of disturbance that passes directly through the wire. This is picked up by the sensitive microphone amplifier unit and since it contains the correct frequency it is identified as the right signal. 

Conclusion

Do not connect sensitive amplifying circuits to speakers (or motors).

I could have guess this would happen and kind of expected it, so hopefully I get some quality time tonight using 433Mhz radio for synchronization tonight.


Oh and I received my order , I look forward to test the Dual Monolithic Tone Decoder and compare it to the fft-results

New parts recieved, mostly capacitors and some IC´s 

Thursday, February 7, 2013

New parts recieved

I just received another package of parts at least in part for use with the robot
New parts received

The HC-SR04

For the HC-SR04 I use the NewPing library

From the datasheet
Specifications:
power supply :5V DC
quiescent current : <2mA
effectual angle: <15°
ranging distance : 2cm – 500 cm
resolution : 0.3 cm
I already have a SR04 and plan to use these two for obstacle avoidance. They have a quite wide beam so they are not that good for mapping. Right now I have one placed on top of the Sharp sensor to give accurate measurements below 16 cm. The ranging distance seems to be more about 240cm.


433Mhz radio reciever x2 and transmitter x2


For the transmitters and receivers I use the VirtualWire library

I dont have datasheets on these, but I hope they are similar to the other units I have tried before in my wireless sensor project. I have two receivers and two transmitters of different types and think they are very easy to use and stable on short distances.

A transiever pair should be placed on the robot itself another pair should be used with the Raspberry pi. The robot should send sensor data and recieve orders or processed sensor data.
A transceiver shield from my wireless sensor project. (on top of Arduino Ethernet)


Switches

switch
10 PCB switches... to be able to switch on and off the battery for the robot...

Some shield material and 3x ATMEGA8´s

Shield PCB. headers and 3x ATMEGA8

The headers are to be used in some shield projects. I plan to build a Paper-Duino Pi. And perhaps build a few more arduino boards. 

The ATMEGA8 datasheet. A post on how to program the ATMEGA8 here. The atmegas are to be used to build soundbeacons for robot navigation. Not totally figured that one out yet :)

Conclusion

Except for the ATMEGAs there was not a lot of news or untried parts in this delivery but it is always fun to unpack new stuff. I really need to get me better storage for all my parts.