| Gyroscope and Accelerometer chip(image src) |
Tuesday, April 30, 2013
Order placed on Gyroscope + Accelerometer and new webcam
I just placed an order for a Gyroscope/Accelerometer chip. I intend to use it on my robot to provide better movement readings.
I also ordered a mini webcam, the one I currently sometimes produce distorted images when connected to the RPi. Not having my hopes so high on this one but you never know...
Saturday, April 27, 2013
Finally reliable SSH and VNC to my robot
In order to program my robot I need to be able to program both the Raspberry Pi and the Arduino Duemilanove. But the RPi is being run headless and the Arduino is connected to the RPi through serial connection so I can only program them through wifi network access.
The Wifi access has been problematic since the WiFi was closing inward connections all the time. I could connect to the robot but only if the robot first made a connection outwards using the same protocol, really weird. It seems it is my Netgear router that is the source of my troubles since when I use another router the problems went away.
Now I can SSH to the Robot and start vncserver, after that I connect to the RPi using TightVNC Viewer. It feels a little bit sluggish compared to attaching screen and keyboard but its really quite ok. I can start Arduino IDE and program the Arduino board without any problems.
Ultimately I would like an easier way of coding on my PC and deploy on the robot since the RPi takes a lot longer to compile on.
Here is a tutorial for those who needs it: http://www.raspberrypi.org/phpBB3/viewtopic.php?f=29&t=29497
The Wifi access has been problematic since the WiFi was closing inward connections all the time. I could connect to the robot but only if the robot first made a connection outwards using the same protocol, really weird. It seems it is my Netgear router that is the source of my troubles since when I use another router the problems went away.
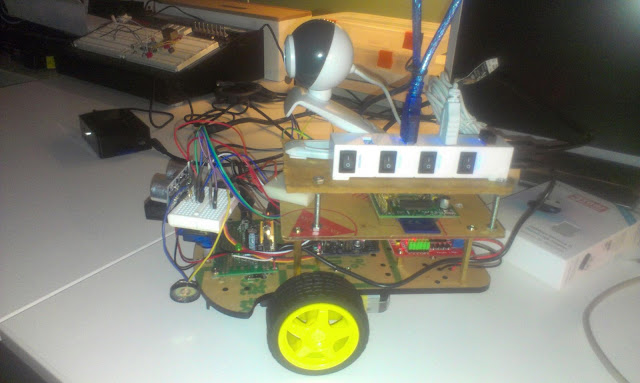 |
| Robot with Pi running headless |
Now I can SSH to the Robot and start vncserver, after that I connect to the RPi using TightVNC Viewer. It feels a little bit sluggish compared to attaching screen and keyboard but its really quite ok. I can start Arduino IDE and program the Arduino board without any problems.
 |
| Starting vncserver from SSH |
Here is a tutorial for those who needs it: http://www.raspberrypi.org/phpBB3/viewtopic.php?f=29&t=29497
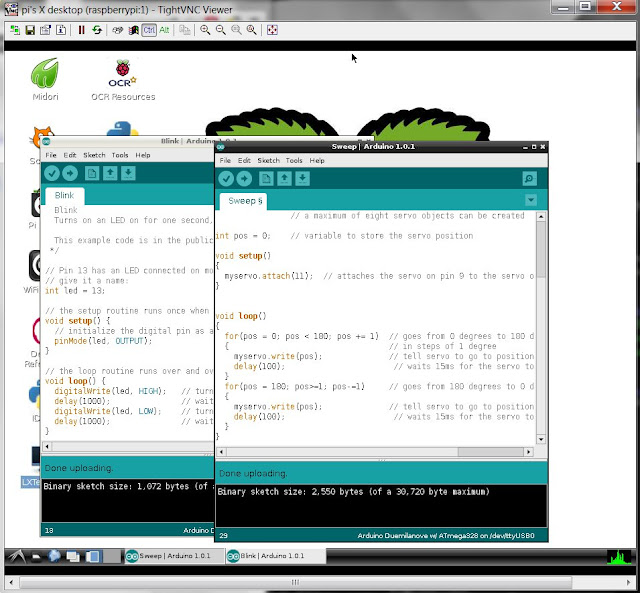 |
| TightVNC Viewer |
Sunday, April 21, 2013
Assembly, programming, and camera tests
I have started the assembly of my three storage robot. Not that easy considering how much hardware this little dude got. Good thing is that the power-supply I soldered the other day seems to hold up nicely. A great thing is that I can run the robot on external power when I´m not driving it. So today I attached power, keyboard and screen since I have problem connecting to it with SSH. My Wifi-dongle seems to go into power-save mode every five seconds or so, making it hard to connect to... Well will buy new one.
I still got a few cables to connect for the speaker and electronic compass, and give power to the H-Bridge. Also maybe the compass circuit can be directly connected to the GPIO of the Raspberry Pi. That would free up some pins(and memory) on the Arduino-board.
The webcam and USB-hub remains to be permanently attached on the topmost layer. I think I will use double sided tape. The cable that connects the webcam is very much too long and adds up to the weight of the robot. A nice thing with the USB-hub I use is that it has got individual power buttons, so I can switch on and off different hardware during programming.
The important test for today was to program the Arduino board from the RPi. I tried the Blink sketch first since nothing is attached to the pin 13. I also ran the Sweep-sketch to test the servo that controls the head of the robot. The head moves fine and no cables get stuck...
I have also tried using the webcam from the raspberry pi linux console. I used the "mplayer -vo png -frames 1 tv://" command that takes a single screenshot naming it 00000001.png. The images are a bit dark but I think it will work.
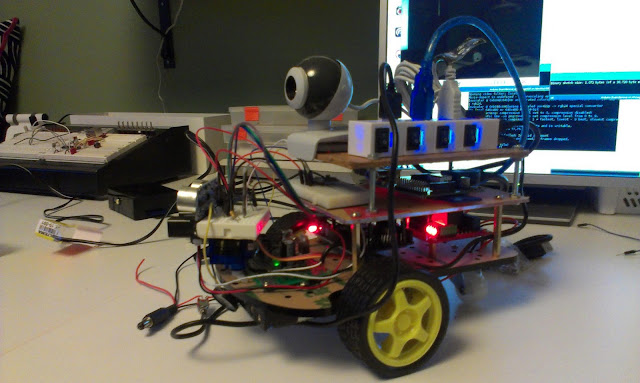 |
| A beautiful mess of cables and LEDs |
I still got a few cables to connect for the speaker and electronic compass, and give power to the H-Bridge. Also maybe the compass circuit can be directly connected to the GPIO of the Raspberry Pi. That would free up some pins(and memory) on the Arduino-board.
The webcam and USB-hub remains to be permanently attached on the topmost layer. I think I will use double sided tape. The cable that connects the webcam is very much too long and adds up to the weight of the robot. A nice thing with the USB-hub I use is that it has got individual power buttons, so I can switch on and off different hardware during programming.
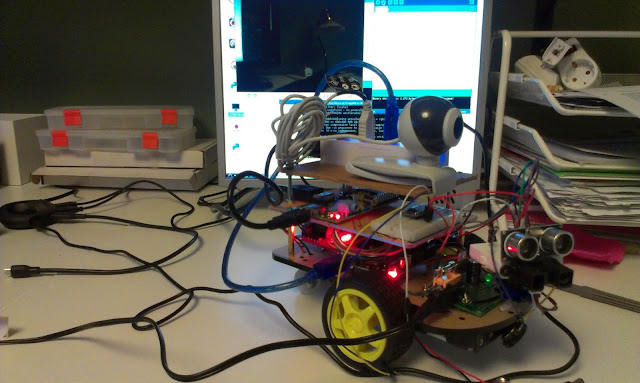 |
| Programming the Arduino from the Pi |
More test will have to be done to test the Sonar and IR, but I think I will need to dissemble the robot first in order to attach those cables properly.
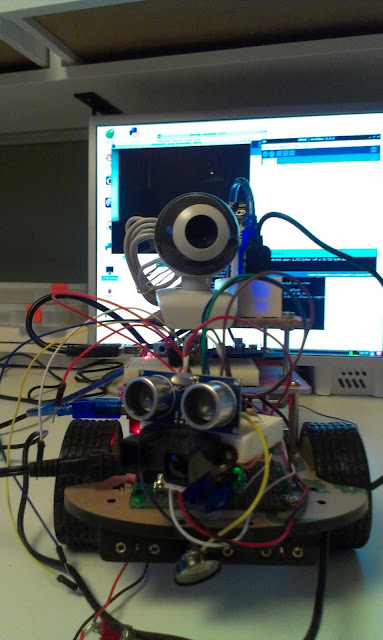 |
| Sensors: Webcam, Sonar, IR and speaker. Battery pack can be seen on the bottom. |
Tuesday, April 16, 2013
Power supply for my robot
Tonight's project, a power supply (DC to DC converter) for my robot project. It must be able to power a USB hub. The hub in turn powers the Raspberry Pi Model A, WiFi dongle, a Webcam, and an Arduino board. The power supply should also provide power for the H-Bridge and motors.
The Arduino itself directly powers the servo, IR sensor, Sonar, Electronic Compass, and perhaps a 433 MHz radio.
The 7805 is rated for 1 Amps, I've got a resetable PTC fuse rated for 0.3 Amps, but I think I will replace it with a fast 1A glass fuse. I will also have 1N4001 to make sure the batteries are placed the right way, a LED to show power is on, and a on/off switch.
When trying to boot the RPi from 9V battery the Pi reboots directly after the colored splash screen indicating that the single battery cannot provide the requested amount of power:
When connecting the powersupply to a battery-eliminator that can provide more current the pi boots up fine, so it is the single nine volt battery that is the source of the problem.
I connected it to the 6 AA battery pack on the underside of the robot and it booted up fine... Epic win!
The Arduino itself directly powers the servo, IR sensor, Sonar, Electronic Compass, and perhaps a 433 MHz radio.
The 7805 is rated for 1 Amps, I've got a resetable PTC fuse rated for 0.3 Amps, but I think I will replace it with a fast 1A glass fuse. I will also have 1N4001 to make sure the batteries are placed the right way, a LED to show power is on, and a on/off switch.
 |
| Power supply in parts |
The parts list
- Perfboard PCB
- DC connector
- Fuse holder
- 1 Amp fast fuse
- 220 uF electrolytic capacitor
- 10 uF electrolytic capacitor
- 2.4 KOhm resistor
- Green LED
- 7805 1 Amp
- 2.1 mm DC plug (for the USB hub)
 |
| Powersupply for my robot, First LED test |
 |
| Connected the power-supply to the hub. And the hub powers the robot and the Raspberry Pi |
"Immediately after displaying the splash screen, the PI starts consuming a little more current, if the PI resets at that moment its an indication that the power supply isn't able to deliver the full current your PI requires" - R-Pi Troubleshooting
| Image from http://elinux.org/File:Debug-screen.jpg |
When connecting the powersupply to a battery-eliminator that can provide more current the pi boots up fine, so it is the single nine volt battery that is the source of the problem.
 |
| Robot batteries on the underside |
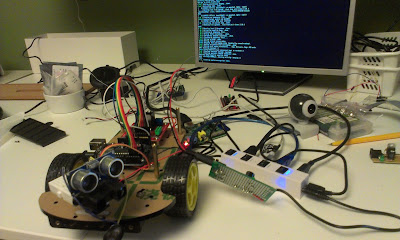 |
| Pi running and booting fun from the 6 AA batteries |
Saturday, April 13, 2013
Playing with robot component layout
Today I started to think of different layouts for my robot. I intend to put lots of stuff on this one, that means I quickly ran out of space. Therefore the layout will require at least 3 storage's of components.
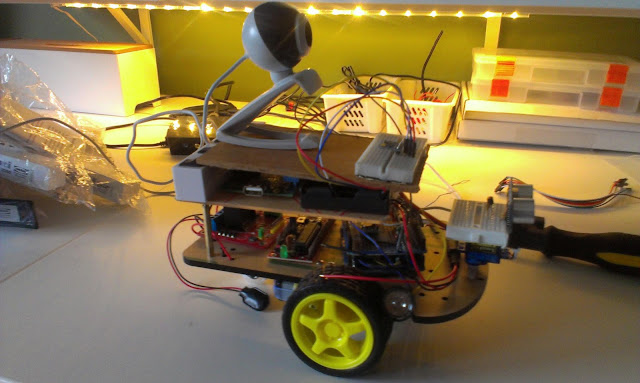 |
| On top camera and electronic compass |
Nothing is connected so far, I have tested different components separately. For these images I just put stuff on top of each-other to get a feel for the space requirements and possible problems.
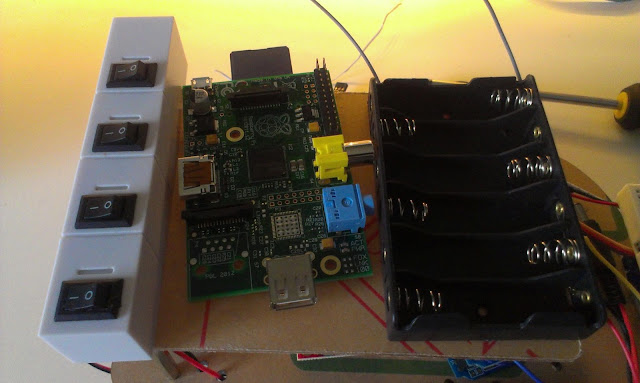 |
| Middle level, USB hub with wifi, Raspberry Pi Model A, and batteries |
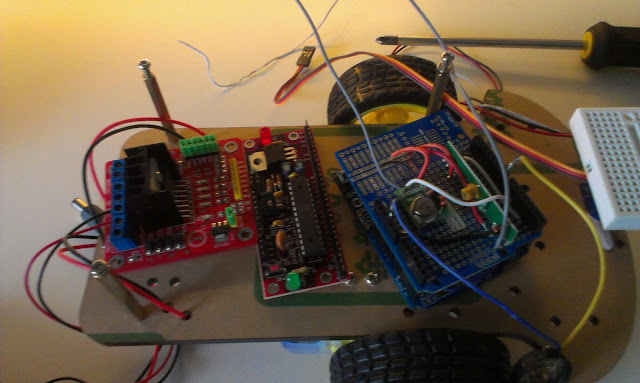 |
| Bottom level, H-Bridge, Arduino 1, Arduino 2 with 433 MHz radio and speaker. |
 |
| A speaker for the localization-trilateration of the robot. |
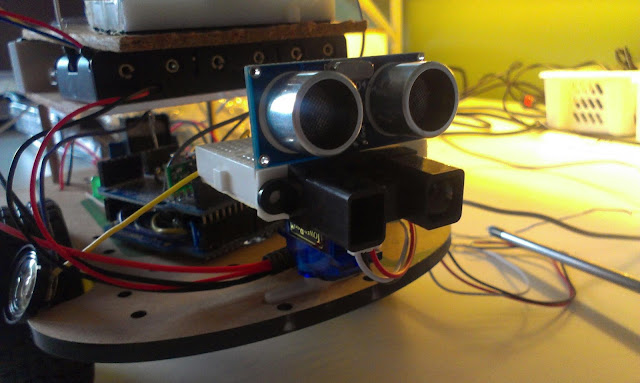 |
| Distance Sensors,HC-SR04 and Sharp IR sensor for mapping |
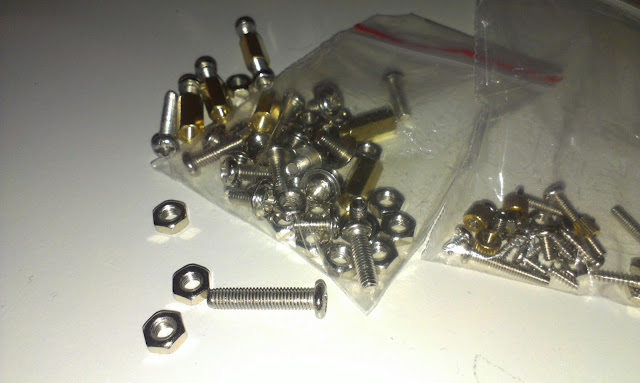 |
| Now its time to drill holes and connect the different components... |
Tuesday, April 9, 2013
Raspberry Pi Model A, provides less power through the USB port
 |
| Model A to the left, Model B to the right (on case bottom) |
 |
| Testing the Model A using a powered USB hub |
I tried the board with Raspian OS, same SD card I have used with my other Pi. A definitive problem is that the USB port of the Model A seem to provide less current than that of the Model B!
This meant the USB-wifi could not be powered directly from the Model A while it worked fine on Model B. It works if I connect it through the powered USB-hub.
This becomes a problem for me since I intend to use it on my robot, and use the WIFI connection to program it, and it is kind of tricky to use a powered USB-hub on the robot...
I guess it is possible to buy a battery powered USB hub, but the space is quite limited on the robot...
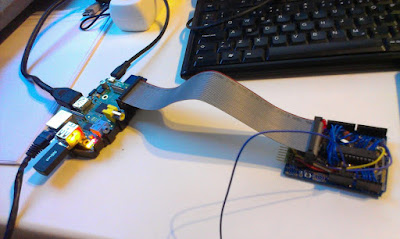 |
| The Custom Arduino board for RPi (connected to Model B) |
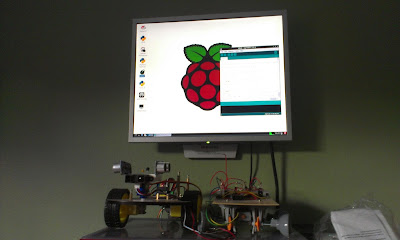 |
| Running Arduino IDE on the Pi and my two robots below... |
 |
| The USB wifi that does not work on the Model A unless I connect it to a powered USB hub. |
Subscribe to:
Comments (Atom)